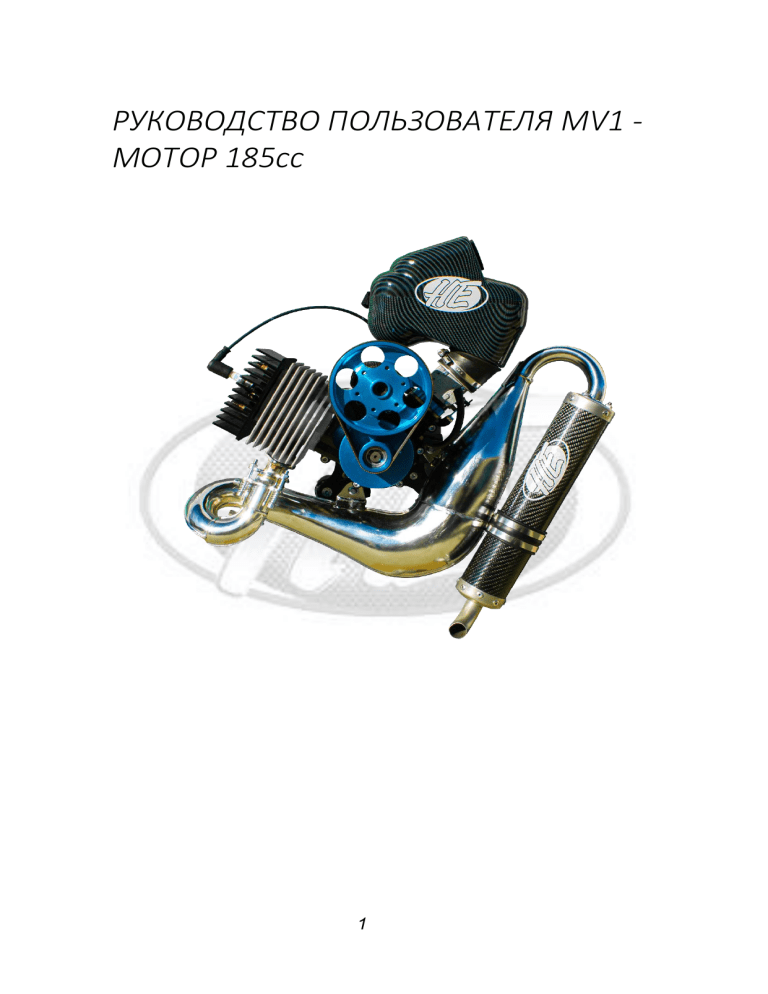
РУКОВОДСТВО ПОЛЬЗОВАТЕЛЯ MV1 МОТОР 185cc 1 РУКОВОДСТВО ПОЛЬЗОВАТЕЛЯ MV1 Мобильный: +34 666 45 44 08 C/ Tin – Nº56 28510 Field Real Madrid – Spain Телефон: +34 918 73 88 35 Факс: +34 918 738691 Электронная почта: [email protected] СОДЕРЖАНИЕ • ВВЕДЕНИЕ И ИДЕНТИФИКАЦИЯ ВЛАДЕЛЬЦА • ТЕХНИЧЕСКИЕ И СТРУКТУРНЫЕ ХАРАКТЕРИСТИКИ • ВНИМАНИЕ • ГЛАВНЫЕ ПАРЫ • СБОРКА / РЕГУЛИРОВКА /ТОПЛИВНЫЙ КАРБЮРАТОР • БЕГСТВО В • ТЕХНИЧЕСКОЕ ОБСЛУЖИВАНИЕ / • • • • • • • ЦЕНТРОБЕЖНОЕ СЦЕПЛЕНИЕ НАТЯЖЕНИЕ РЕМНЯ РЕДУКТОРА / ЗАЖИГАНИЕ ГАРАНТИЯ ПРОБЛЕМЫ ВАЖНЫЕ СОВЕТЫ ПРИНАДЛЕЖНОСТЬ К ГРЕБНОМУ ВИНТУ КАК ЗАПУСТИТЬ ДВИГАТЕЛЬ ПРИМЕЧАНИЯ 2 MV1 USER MANUAL ВВЕДЕНИЕ Спасибо, что выбрали MV1! Данная инструкция по использованию является неотъемлемой составляющей комплекта поставки двигателя MV1 - сохраняйте её, она может быть полезна в том случае, если мотор будет продан/передан другому потребителю. Before installing and operating the engine, read this manual carefully. The purpose of this manual is to provide the user with all the information he needs to manage the engine correctly by himself and in the safest way possible. It includes information on the technical aspect, operation, machine shutdown, maintenance, spare parts and safety. If only a part of the manual is not fully understood or in case the manual is not clear or exhaustive, do not hesitate to contact the authorized distributor or our factory The manufacturer and resellers are ready to answer your questions and, if necessary, to solve any problems, because THE SAFETY OF OUR CUSTOMERS IS THE MOST IMPORTANT THING FOR US. • IDENTIFICATION OF THE HOLDER Serial number: Name and address of the owner: Owner's signature Reseller's signature Date of sale: / / WARNING! • Please note that the engine may stop, break, or shut down at any time. This could lead to a crash into the ground or a landing in hostile areas with possible damage/death of the pilot or other people. The ultralight moved by this engine must fly in permitted spaces, must not fly over a crowd of people, inhabited centers, areas that have difficult or empty landings, must not fly over 3 MV1 USER MANUAL areas of water or where it is possible to drown. Always keep in mind that the engine may turn off or break, so consider a possible emergency landing for every situation. If used in other applications, proper operation cannot be guaranteed. • This engine is not certified. It is not an engine with aeronautical guarantees or certifications. Its construction is intended for experimental and non-certified aircraft. • The engine needs to have a porex filter in the tank to avoid different problems that could appear with the carburetor • Some zones for particular atmospheric conditions such as pressure, temperature, humidity can lead to a different operation of your engine. Before starting each flight, test the engine on the ground and verify that it does not have an anomalous behavior. 4 MV1 USER MANUAL TECHNICAL AND STRUCTURAL CHARACTERISTICS ENGINE - Single-cylinder 2-stroke COOLING - Propeller removal DISPLACEMENT - 184,70 cm3 (54×66) CYLINDER - Coated nikasil aluminium CARBURETOR - Walbro POWER - 25 HP / 8. 300 R.P.M. IGNITION - Electric ignition coil TRANSMISSION - Belt driven Poly V with centrifugal clutch RATIO - 1 / 2.90 STARTER - Flash starter- (Built-in easy start system) / Electric starter available FUEL - Unleaded petrol + synthetic oil 2,5 % WEIGHT - 14 Kg. complete THRUST - 79 Kg. 5 MV1 USER MANUAL MAIN PAIRS o Cylinder head nuts 16-17 Nm o Steering wheel nuts 42-45 Nm o Pinion nuts 42-45 Nm o Crankcase screws 10 Nm o Spark plug 25 Nm o Cylindrical bolts 20 Nm o Exhaust bolts 25 Nm o Exhaust nuts 32 Nm o Motor support screws 15 Nm o Screws or nuts of 4mm 2.5-3 Nm o Screws or nuts of 5mm 6-6.5 Nm o Screws or nuts of 6mm 9-10 Nm o Screws or nuts of 8mm 25-27 Nm o Carburetor flange screws 10 Nm o Carburetor plastic connector screws 05-06 Nm o 6mm carbon propeller screws 10-12 Nm or 1 Kg/m=9.81 Nm ASSEMBLY: 6 MV1 USER MANUAL You can install the motor in the frame using 4 40 mm rubber brackets. To fix the propeller use only bolts of class 10/8 (100 Kg) and make sure that its length is sufficient to exit the reducing pulley. Squeeze the 6 M8 bolts on a cross, at 1.5 /2.0 Kg.m.(15/20 Nm). Check the torque of the bolts again after the first hour of engine operation. For the connection between the carburetor and the fuel tank, use a suitable hose of the correct diameter. The length of the fuel line shall not exceed 80 cm. IMPORTANT NOTES: DO NOT attempt to start the engine without the propeller. DO NOT start the engine with bolts or loose parts, as this can cause propeller detachment, ovalization of propeller holes, and damage to rubber supports. IMPORTANT! BEFORE YOU FLY, ALWAYS CHECK EVERY PART OF YOUR SHIP, FROM THE ENGINE TO THE FRAME. Verify that there are no damaged electrical wires, that there are no leaks from hoses, tank, carburetor or engine crankcase, that the propeller is not damaged or loose, that the exhaust pipe has no cracks, that the frame is not bent or broken due to falls, that the rubber supports are not cracked, that the reduction belt is not loose, and each bolt is tight. Finally the engine can be started, letting it warm up to a speed of 2,200 to 3,000 rpm with a head temperature of at least 100 °C. FUEL 7 MV1 USER MANUAL Use for the blend only premium gasoline for 98-octane cars, along with good quality synthetic oil for blends to a amount of 2.5% (DO NOT USE MIXTURE ALREADY MADE AT THE GASOLINE PUMPS). When preparing the mixture, make sure that the can has no dirt or water, always put the oil first and mix well. Never run the engine without the air filter, as dirt and dust raised by the propeller can damage it. CARBURETOR ADJUSTMENT The carburetor has an adjustment screw for high rpm. CARBURETTOR CONFIGURATION MV1 ENGINE 185cc Screw H Screw L Idle 45 to 50 min 30 minutes 2100 To 2250rpm/s Suffocat e control liver Idle L H This is the standard carbohydrate. As an engine manufacturer, of course, any carburetor must be adjusted based on weather conditions and flight altitudes. 8 MV1 USER MANUAL WARNING: THE FOLLOWING OPERATION SHOULD BE PERFORMED WHEN THE ENGINE IS HOT. To regulate fuel flows, gently play with the H lever by opening it in case you need to make the engine run richer, and vice versa by closing it in case you have to run the engine a little thin. The idle screw is used to adjust the mechanical idle. RUNNING-IN All HE PARAMOTOR MOTORS have a quality control before being delivered in order to check if all the components are related to the fixed parameters, but a new taxiing is still necessary. ➢ ➢ ➢ ➢ ➢ ➢ ➢ A CORRECT OPERATING PROCESS WILL PROLONG THE LIFE OF YOUR ENGINE! Go somewhere quiet, place a thick rubber mat under your boat to prevent stones or other things from damaging the propeller by putting it on the ground and let the engine work at a speed of 2500 rpm for 5 minutes, then regulate the speed to 3000/3500 rpm for 15 minutes, then to 4000 rpm for another 15 minutes. Turn off the engine and check that there are no loose nuts or bolts and that all components are fine. DO NOT TOUCH THE HOT PARTS! (POWER UNIT AND EXHAUST PIPE). Start the engine again and take it step by step at 4000 rpm for 5 minutes, then accelerate to 4500 rpm for 15 minutes. For the first 10 hours, do not subject the engine to extreme stress and speed. Also during normal use excessive loads (e.g. tandems with the passenger) can strain the engine with possible damage to the engine itself. ALWAYS CHECK your ship in sight before and after each flight, for loose parts or damage. During the rolling period, vary the power often for proper adjustment of the piston ring. 9 MV1 USER MANUAL MAINTENANCE AFTER THE FIRST HOUR OF FLIGHT, CHECK THE TENSION OF THE STRAP AND TIGHTEN IF NECESSARY. AFTER THE FIRST 2 HOURS, TIGHTEN THE HEAD NUTS (IN CROSS ORDER) WITH A TORQUE WRENCH AT 1.6 Kg.m (16Nm). AFTER THE FIRST 3 HOURS OF ENGINE OPERATION, PERFORM A NEW CHECK OF THE BELT AND, IN CASE YOU RETENSIVE IT TO 350 HRZ. - Every 20 hours: o Check the condition and spacing (0.7 mm) of the spark plug or Clean the air filter, carburetor filter placed at the end of the fuel pipe and fuel tank filter o Check the torque of each bolt o Check the tension and condition of the step-down belt or Check the fuel lines and wiring or Check that the starter cable has no abrasions. - Every 50 hours Same controls of the 20 hours and also: o Check the torque of the engine crankcase nuts o Change spark plugs o Change the petals of the reed valve o Check the reduction belt and the set of pulley bearings, change them in case of need o Check the conditions of the starting gears (version with electric start) o Once a year (regardless of flight hours) change the carburetor diaphragm. or N.B. It is advisable to keep records of all maintenance in a logbook for the engine. 10 MV1 USER MANUAL It is also advisable to install an instrument (CHT) to control the temperature of the head in sight. TENSION OF THE REDUCING TRANSMISSION BELT – CAUTION Attention: a belt that is overstressed can cause permanent damage to the pulley bearings and drive shaft. Therefore, we strongly suggest that you carefully follow these instructions. Before adjusting the strap, take a marker or marker and make a small signal on the camshaft and on the front of the reduction plate. This is your Zero or starting point and from here you can clearly see how much you move the eccentric tensioning cam in relation to the reduction plate. Remember that these are fine adjustments and we suggest not rotating the cam more than 1 mm per adjustment. After each adjustment you can try to start the engine and check the result. If the motor does not start well, it usually means that the belt is still too loose and is sliding, in this case repeat the operation by tightening the belt another 1 mm. Note that if the belt slides a little, but the motor still starts well, then the tension is correct. The belt tension always increases automatically when the engine is running due to thermal expansion in the pulleys. Once you've found the right tension, don't adjust it anymore. If in doubt, please contact your paramotor dealer or the HE team. To adjust the strap dothe following: o Loosen the cam of the pulley bolt localized, once it is loosened 11 MV1 USER MANUAL You can then rotate the cam with a Key size n.27 mm - be careful to observe the increments of 1 mm. or Once you have finished turning the cam, remember to tighten the safety bolts back to 2.5 kg. (25 Nm), first the rear bolt, holding the cam firm with the wrench, and then the side bolt. IGNITION In case the coil and/or steering wheel need to be changed, it is mandatory to turn to your dealer or trained personnel, even if this operation may seem simple at first glance, since the timing of the engine, if incorrect, can change the performance and cause damage to the engine. To check the time: the distance between the coil and the flywheel magnet is 0.4-0.5 mm. GUARANTEE Warranty includes spare parts and labor, transportation excluded. For any defective part, please contact your authorized reference or heiferous dealer directly, so that you can get the appropriate indications on how to handle it. WARRANTY DURATION 2 YEARS from the date of purchase from PARAMOTORS HE. THE WARRANTY IS VOID IN THE FOLLOWING SITUATIONS: 12 MV1 USER MANUAL • Alterations in the engine not approved by • • • • • • • • • • • PARAMOTORES HE. Wear of engine components due to non-compliance with product manual instructions. Accidental falls or falls of the engine or its components. Overheating and seizure of the engine due to prolonged high-speed operation of the engine, running under excessive loads, running on improper loads, running on insufficient oil in gasoline (for improper carburetor adjustment) or running only on gasoline (oil mixture is omitted). The presence of dirt, sand or foreign bodies in the carburetor of the engine. Corrosion due to poor engine storage or inadequate preparation for engine storage. Run the engine without an air filter installed on the carburetor. Incorrect assembly of engine parts or components not assembled by HE ENGINES but by the manufacturer of the paramotor or by the end user, supplied disassembled for packaging and transport purposes, including all electrical or electronic components. Corrosion of the engine or components emanating from stone chips or any other impact or damage from abnormal stress. Work other than maintenance set out in the product manual carried out on the engine by anyone other than PARAMOTORES HE or official dealers. Incidental or consequential loss or damage. Engine used for use in racing. 13 MV1 USER MANUAL PARAMOTORS HE AND HIS RESELLERS REMAIN AT YOUR DISPOSAL FOR EVERY INFORMATION AND ADVICE ON THE USE OF THE ENGINE PROBLEMS THE ENGINE DOES NOT START Check: ❑ turn on and off ❑ spark plug cable ❑ correct spark plug space ❑ all power plant connections ❑ that the fuel arrives correctly from the tank to the carburetor FLOODED ENGINE ❑ Disassemble the spark plug ❑ dry it well ❑ before reassembling it, let the propeller turn slowly 2/3 times. THE ENGINE DOES NOT MAINTAIN IDLE SPEED OR HAS A IRREGULAR SPEED ❑ Clean and adjust the carburetor. ❑ Check that the petals of the sheet box valve are closing completely. ❑ Hold the sheet box to a light and you shouldn't see any light beyond the petal seating area. THE ENGINE CANNOT REACH THE MAXIMUM SPEED ❑ Check that the cable pulls the throttle wide open. ❑ Check for dirt on the carburetor or tank filter or restrictions on the fuel pipe, due to overly tight curves or air bubbles. ❑ Check the spark plug; if it is worn, change it with one of the same brand and the same heat range. 14 MV1 USER MANUAL In case the head is disassembled to be decarbonized, change both the head gasket and the cylinder gasket. IMPORTANT TIPS DO NOT FLY in bad weather conditions! NEVER start the engine with people near the propeller or on the sides. The RUPTURE of a propeller can cause very serious injuries even several meters away. DO NOT keep the engine at maximum rpm after takeoff, except for absolutely necessary weather and for emergencies (obstacles or sudden wind). If you use large propellers, REMEMBER that cooling is not perfect flying at high speed, so keep the temperature(240º the engine under control with the appropriate instruments (CHT). C) of In addition, it disassembles the propeller at regular intervals and checks that it is perfectly balanced, since an unbalanced propeller, even slightly, creates microvibrations that are not felt by the pilot, but that can seriously damage parts of the engine with the consequent breaks. Please DO NOT forget that the propeller has mass and a considerable inertial moment, so it is advisable not to suddenly vary the RPM of the engine, both in flight and on the ground. 15 MV1 USER MANUAL These sudden and violent stresses could cause damage to the reduction, the engine, the belt and also possible deformations in the propeller fixing holes. Once you've found the perfect carburetion, DON'T modify it unless you change your flight location by going to much higher or lower altitudes or unless the weather and temperature are very different from what you usually fly. PROPELLER ACCESSORY Helix paramotors recommends using Helix propellers. 16 MV1 USER MANUAL In case of propeller impact, it is necessary to verify that all engine parts have not suffered any damage, paying special attention to the components listed below: Reduction pulley and bearings; Eccentric reduction; the engine crankcase and crankshaft, the crankcase bracket and the rubber engine mounts. The rotation of the propeller is counterclockwise, taking into account the rear view. Push the propeller against the reduction drive, until it is fully inserted. Now gently screw the bolts to the end. Make sure the bolts are suitable for the propeller in use. Maximum pressure to apply: • Carbon propeller: 10-12 N/m in each M6 bolt; HOW TO START THE ENGINE We want to remind you that proper priming is the key to starting any 2-stroke engine. Follow the instructions below: 1. Lightly press the pin on the measuring diaphragm of the WB37 cover to prime the carburetor. 2. Stop priming the engine once the fuel enters the carburetor. Remember that the less fuel you get, the lower the risk of flooding your engine too much, making it even harder to start. 17 MV1 USER MANUAL 1. Pull the rope quickly, without reaching the final race. In winter, or in cold weather, it can help the engine start by closing the choke. Pull the rope 2-3 times, until you hear the knock in the combustion chamber of the engine, then open the choke again and start the engine. During the commissioning phase, always pay the utmost attention to the propeller and those who may be nearby. Many accidents happen before you fly. In each test or warm-up, we suggest always using the paramotor on the shoulder, to hold the harness, take a look around, then start the engine with the traction (or electric) starter, however, always be ready to press the off button, in order to stop the engine at any time if necessary. 18 MV1 USER MANUAL 19 MV1 USER MANUAL 20
