ГЕНЕРАТОР СНЕГА ANTARI SW-250 Руководство пользователя
реклама
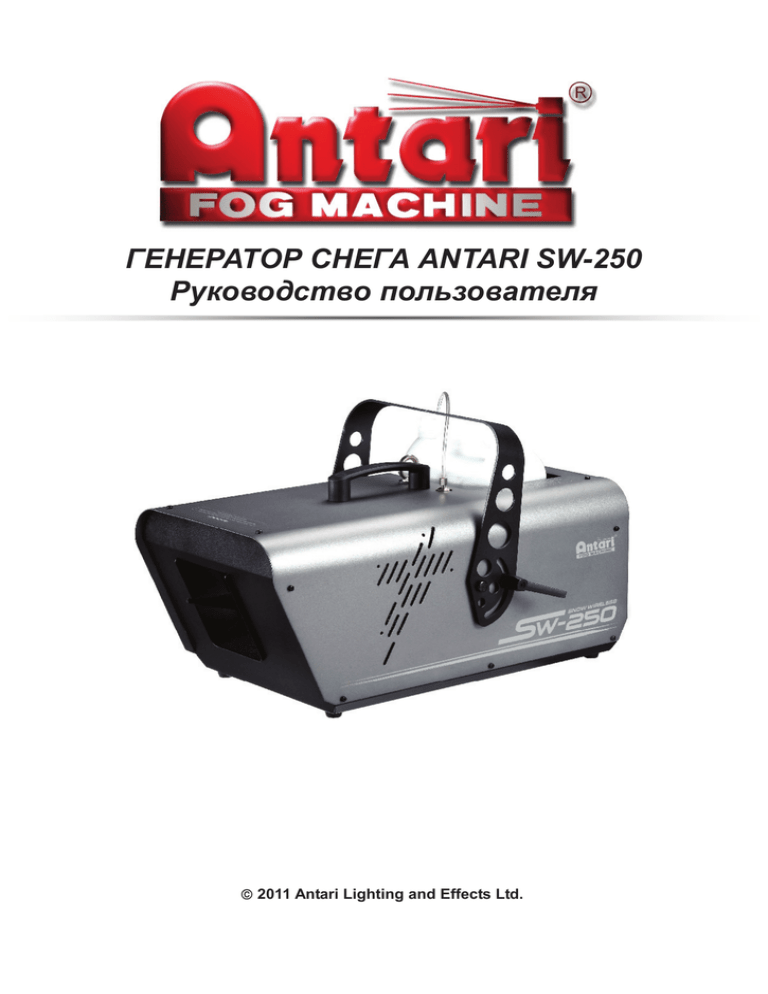
ГЕНЕРАТОР СНЕГА ANTARI SW-250 Руководство пользователя 2011 Antari Lighting and Effects Ltd. 1 2 ГЕНЕРАТОР СНЕГА ANTARI SW-250 Введение Благодарим за выбор генератора снега SW-250 компании ANTARI. Прежде чем начать использование рекомендуем внимательно прочесть все приведенные далее инструкции. Следуя все инструкциям, предложенным в данном руководстве, вы обеспечите надежную работу генератора снега Antari SW-250 на многие годы. ! Также, внимательно выполняя все операции и соблюдая меры предосторожности, вы гарантируете безопасное использование машины. Риск поражения электрическим током • Содержите устройство в сухом виде. • Устройство предназначено для использования только внутри помещений. Не используйте его вне помещений. • Используйте только заземленную розетку. До начала использования, убедитесь, что переключили устройство для подключения к сети соответствующего напряжения. • Всегда отключайте питание генератора снега перед заполнением бака. • Отключайте питание машины или отключайте ее от сети, если не используете ее. • Генератор снега не является водонепроницаемым. При попадании в устройство воды или жидкости немедленно отключите его питание. После отключения протрите устройство сухой тканью и дождитесь полного высыхания. Если во время использования устройства снова возникли проблемы, обратитесь за помощью к дилеру ANTARI. Риск возгорания • Внутри устройства нет частей, доступных для обслуживания или изменения пользователем. Ни в коем случае не разбирайте корпус устройства и не ремонтируйте или не дорабатывайте его, в противном слчае это может стать причиной возгорания. • Устройство предназначено для использования только взрослыми. Не устанавливайте устройство в зоне досягаемости детей. Не оставляйте работающее устройство без присмотра. • Установите генератор снега в хорошо проветриваемом помещении. Не забудьте оставить не менее 20 см вокруг устройства для нормальной вентиляции. • Не добавляйте легковоспламеняемые средства (такие как масло, газ, одеколон) к жидкости генератора снега. • Используйте только высококачественную жидкость Antari SL-5(A), рекомендуемую производителем. Не используйте другую жидкость, так как это может привести к разрушению внутренних деталей. • Если генератор Antari SW-250 перестал нормально работать, немедленно отключите его от сети. Обратитесь к дилеру Antari. Слейте всю жидкость из резервуара, тщательно упакуйте устройство (желательно в его упаковку) и возвратите его дилеру ANTARI для проведения сервисных работ. ! Соблюдайте требования всех инструкций, указанных на корпусе генератора снега ANTARI. 3 ПРОВЕРКА КОМПЛЕКТАЦИИ Откройте коробку и проверьте наличие всего необходимого оборудования. Упаковка должна содержать следующие детали: 1. Генератор снега с кабелем питания. 2. Беспроводной передатчик W-1 3. Резервуар 4. Монтажный кронштейн 5. Набор винтов и руководство пользователя Прежде чем начать монтаж генератора снега SW-250 ANTARI, убедитесь, что детали не были повреждены при транспортировке. Если вы увидели, что корпус устройства или кабель питания повреждены, не включайте устройство и не пытайтесь пользоваться им, пока не свяжетесь с дилером ANTARI. УСТАНОВКА и ВКЛЮЧЕНИЕ ПИТАНИЯ 1. Извлеките весь упаковочный материал из коробки. Убедитесь, что извлекли все кусочки упаковочного материала. 2. Установите генератор на ровную поверхность и выполните следующий шаг. Насосная трубка Переходник с Крышка резервуара Фильтр Резервуар гайкой Сборочный резервуар и фильтр Учтите, что «переходник с гайкой» должен быть установлен очень плотно. 3. Закрепите монтажный кронштейн к машине с помощью винтов M8; подтягивающие винты используются для настройки угла машины при навесном монтаже. Монтажный кронштейн Винт М8 Подтягивающий винт Шайба Крепление монтажного кронштейна Закрепите четыре шайбы по обеим сторонам монтажного кронштейна с помощью фиксирующих винтов М8 с внешней стороны. 4 4. Fill with ANTARI SL-5(A) snow fluid. Any other types of fluid can damage the unit. When filled, place cap back on liquid tank. 5. Plug the power cable into a grounded electrical outlet and switch the power switch at the rear of the machine for powering on. 4. Заполните резервуар жидкостью ANTARI SL-5(A). Любой другой вид жидкости может повредить устройство. После заполнения резервуара установите крышку на место. TRANSMITTER 5. Подключите шнур питания вREGISTRATION заземленную розетку и включите питание генератора расположенным на задней панели выключателем. After powering on, the LCD screen will show sequentially “Antari SW-250” and then “Wireless Setup…”. Press button “A” onПЕРЕДАТЧИКА the transmitter(s) to register when see “Wireless Setup…” is on. There are totally 15 seconds for РЕГИСТРАЦИЯ finishingпитания the registration the transmitter(s). Once registration is completed, the LCD screenSetup...”. will blink and После включения на экранеof попеременно будут отображаться сообщения “Antari SW-250” и “Wireless beep. The LCD screen willна finally show “Wireless Setup.OK” theсообщения 15 seconds ends. Up to 5 Подоtransmitters Для регистрации нажмите кнопку “A” передатчике при отображении наonce экране “Wireless Setup”. ждите около 15 секунд завершения регистрации передатчика. По transmitter завершенииhas процедуры регистрации экран are allowed to для be registered with one SW-250. The included been registered with the machine начнет мигать и генератор издаст звуковой сигнал. Через 15 секунд на экране будет отображено сообщение “Wireless before shipment and can be directly operated without any start-up setting. Therefore, the registration is only Setup.OK”. Вы можете зарегистрировать до 5 передатчиков на генераторе SW-250. Входящий в комплект передатчик needed before use of new W-1. был зарегистрирован на генераторе до его поставки, поэтому может использоваться без предварительной настройки. Таким образом, регистрация необходима только при использовании нового передатчика W-1. Note: All transmitter(s) registration must be completed within 15 seconds or SW-250 has to be power on Примечание: всех передатчиков должна выполняться в течение 15 секунд, затем питание генератора againРегистрация for next registration. SW-250 должно быть снова включено для последующей регистрации. ОПЕРАЦИИ НА ЭКРАНЕ LCD CONTROL OPERATION After transmitter(s) registration timeнаends, LCD screen will thenсообщение show “Ready To To Snow”. the генеmachine is По завершении регистрации передатчика(ов) экране будет отображено “Ready Snow”.Now Теперь ратор готов к использованию. ready for operating. FUNCTIONS SETTING НАСТРОЙКА ФУНКЦИЙ Down/Volume buttons to 200 Down/Volume (10 (10 to 200 seconds). Нажмите кнопкуbuttons Menu для выполнения настроек различных как описано далее. Press Menu button for seconds). setting different functionsфункций, per sequence as below. Вверх/Timer и Interval Set Для настройки интервала времени нажатием кнопок Duration Set Для настройки длительности работы в режиме таймера нажатием кнопок the output volume timer by pressing Up/Timer rmer OutOut To To set set the output volume under timer mode by pressing Up/Timer andand Down/Volume buttons (10 to 200 seconds). Down/Volume buttons (10mode to 200 seconds). Interval set under the interval time under timer mode by pressing доSet 2000 с)To в режиме таймера. Down/Volume buttons tothe 100 %). volume Down/Volume buttons (1 to(1 100 %).output Timer set volume timer mode pressing Timer OutOut To To setDown/Volume the output under timer mode by by pressing buttons (20 under to 2000 seconds). Вниз/Volume (от 10 до 2000 с). olume To set the output volume under continuous mode by pressing Up/Timer me OutOut To set theDuration output volume under continuous pressing Up/Timer andand Down/Volume buttons to by 100 %). Down/Volume buttons (1mode to(1time 100 %). Set To set the duration under timer mode by pressing 5 Down/Volume (1100 tothe 100 %). Down/Volume (1 to %). Volume Outbuttons To set output volume under continuous mode by pressing Volume Outbuttons To set the output volume under continuous mode by pressing MX512 Add. To set DMX channel under DMX control by%). pressing 512 Add. To set the the DMX channel under DMX control pressing Down/Volume buttons toby 100 Down/Volume buttons (1mode to(1mode 100 %). Вниз/Volume (от 20 Up/Timer and Вверх/Timer и Up/Timer Up/Timer andand Up/Timer and Up/Timer Up/Timer andand Up/Timer Up/Timer andand Down/Volume buttons (1512 to 512 channels). Down/Volume buttons (1 to channels). DMX512 Add. To set the DMX channel under DMX control mode by pressing DMX512 Add. To set the DMX channel under DMX mode by pressing 5 control Wireless activate/terminate wireless control by pressing ess ON ONTo To activate/terminate the the wireless control system by pressing Down/Volume buttons tosystem 512 channels). Down/Volume buttons (1 to(1 512 channels). Up/Timer Up/Timer andand Up/Timer Up/Timer andand Down/Volume buttons (ON/OFF). When wireless control system issystem activated, letter Down/Volume (ON/OFF). When wireless control system is activated, “W”“W” will will Up/Timer Wireless ON activate/terminate the wireless control by pressing Up/Timer Wireless ONbuttons To To activate/terminate the wireless control system by letter pressing andand sing Wireless theDMX wireless by pressing Up/Timer and DMX512 Add. ON To setTotheactivate/terminate DMX channel under controlcontrol mode bysystem pressing Up/Timer and Down/Volume buttons to 200 seconds). Down/Volume buttons (ON/OFF). When wireless control system is activated, letter “W” wi Down/Volume buttons (1 (10 to 512 channels). Timer Out Для настройки выходного объема снега в режиме таймера нажатием кнопок Вверх/Timer и Timer Out setshowed the output volume under timer mode bySnow”. pressing Up/Timer and system be screen To Once the wireless control i Down/Volume buttons (10display tocontrol 200“Ready seconds). Wireless ONВниз/Volume To Toactivate/terminate the wireless system by pressing Up/Timer and (от 1 до under 100%).main Up/Timer and Для настройки выходного объема снега в режиме непрерывной работы нажатием кнопок Вверх/ Volume Out Down/Volume buttons (1200 to volume 100 %).disappear terminated then the letter “W” will accordingly. Timer Out To set the output under timer mode by pressing Up/Timer and Down/Volume buttons (10 to seconds). Down/Volume buttons (10 to 200 seconds). Down/Volume buttons (ON/OFF). When wireless control system is activated, letter “W” will Вниз/Volume (от 1 до 100%). Timer и y pressing DMX512 Up/Timer and Вверх/Timer и Add Для настройки DMX канала в режиме управления DMX нажатием кнопок Volume Out To set the output volume under continuous mode pressing Up/Timer and Quick Start To activate / terminate quick start function by Once pressing Up/Timer and is Down/Volume buttons (1 to 100 %). Timer Out To set the output volume under mode by pressing Up/Timer and system Timer Out To setbe the output volume under timer mode by pressing Up/Timer and showed under main screen display “Ready To Snow”. the wireless control Down/Volume buttons (10 totimer 200 seconds). Вниз/Volume (от 1 до 512 каналов). ssing Up/Timer and Вверх/Timer Wireless ON Для активации/отключения системы беспроводного управления нажатием кнопок Down/Volume buttons (1 to 100disappear %). Down/Volume buttons (ON/OFF). Once Quick Start function is on, the output job underand time Volume Out To setthe the volume under continuous mode by pressing Up/Timer Down/Volume buttons (1output tovolume 100 %). buttons (1 to 100 %). terminated then letter “W” will accordingly. TimerDown/Volume Out To set the output under timer mode by pressing Up/Timer and и Вниз/Volume (ВКЛ./ВЫКЛ.). При активации системы беспроводного управления на экране by pressing Up/Timer Up/Timer and ssing and под сообщением “Ready To Snow” будет отображена буква “W”.terminated После выключения системы беспроDMX512 Toactivate set the DMX channel under DMX control by pressing Up/Timer and resumed or continuous output (LCD/W-1/DMX) mode by power off will directly Down/Volume buttons (1 to%). 100 %). Volume Out To To set the output volume under mode Up/Timer and Volume Out ToAdd. set the output volume under continuous mode bymode pressing Up/Timer andbe Quick Start / terminate quick start function by pressing pressing Up/Timer and Down/Volume buttons (1 continuous to 100 Down/Volume buttons (10 to 200 seconds). Down/Volume buttons (10больше to 200 seconds). водного управления буква “W” не будет отображаться. sing Up/Timer and Вверх/Timer иUp/Timer Quick Start ДляDown/Volume активации/отключения функции быстрого запуска нажатием кнопок Down/Volume buttons (1 to%). 512 channels). afterbuttons power on again. When the unitQuick is power offfunction not under output mode then the LCD screen DMX512 Add. Tothe setbuttons the DMX channel under DMX control mode byon, pressing and Down/Volume buttons (1 to 100 (1 to 100 %). Down/Volume (ON/OFF). Once Start is the output job under timer Volume Out To set output volume under continuous mode by pressing Up/Timer and Timer To set the output volume under timer mode by pressing Up/Timer and Timer OutOut To set the output volume under timer mode by pressing Up/Timer and Вниз/Volume (ВКЛ./ВЫКЛ.). При включении функции Quick Start выбранный режим подачи снега by pressing Up/Timer Up/Timer ressing and and Wireless To activate/terminate the wireless control system by pressing Up/Timer and will resume tounder “Ready To Snow” screen display (LCD/W-1/DMX) до выключения питания будет восстановлен последующем включении генераDown/Volume buttons (1 tomain 512 channels). DMX512 Add. To or set the DMX channel under DMX control mode byпри pressing Up/Timer and DMX512 Add. ToON set the DMX channel DMX control mode by pressing Up/Timer and continuous output (LCD/W-1/DMX) terminated bydirectly. power off will be directly resumed Down/Volume buttons (1 to 100 %). Down/Volume buttons (1100 to 100 %). Down/Volume buttons (1 to %). pressing Up/Timerтора. andЕсли же устройство было выключено до выбора режима подачи снега, то при восстановлении Down/Volume (ON/OFF). When wireless control system activated, letterscreen “W” will Wireless ON To activate/terminate the wireless control system byis pressing Up/Timer работы генератора на экране будет сообщение To Down/Volume buttons toотображено 512 channels). Down/Volume buttons (1buttons to(1 512 channels). after power on again. When the unit is power off“Ready not under output mode then the LCD DMX512 Add. To set the DMX channel under DMX control mode bySnow”. pressing Up/Timer Volume Out To To set output volume under continuous mode pressing Up/Timer Volume Out set thethe output volume under continuous mode by by pressing Up/Timer andand and system activated, letter “W” will tem byis pressing essing Up/Timer andUp/Timer and be showed main screenmain display “Ready To Once thesystem wireless is “W OUTPUT UNDER TIMER MODE Down/Volume buttons (ON/OFF). When wireless control iscontrol activated, econds). Wireless activate/terminate the wireless control system by pressing Up/Timer andletter Wireless ONВON To To activate/terminate thebuttons wireless system bySnow”. pressing Up/Timer andsystem will resume to under “Ready To Snow” screen display directly. ВЫХОД СНЕГА РЕЖИМЕ ТАЙМЕРА Down/Volume (1%). tocontrol 512 channels). Down/Volume buttons (1100 to 100 Down/Volume buttons (1 to %). Once thesystem wirelessiscontrol system is “W” will control activated, для настройки интервала/длительности работы и нажмите кнопку для остаНажмите кнопку letter Вверх/Timer terminated then(ON/OFF). the letter “W” will disappear accordingly. PressDown/Volume Up/Timer button to (ON/OFF). execute theWhen interval/duration timing setSnow”. and press Stop to stop. be showed under main screen display “Ready To Once the wireless control sys timer modeновки by pressing Up/Timer and Down/Volume buttons wireless control system is activated, letter will buttons When wireless control system is activated, letter “W”“W” will Wireless To DMX activate/terminate thecontrol wireless control pressing работы. DMX512 Add. ToON set channel under DMX control mode by pressing byUp/Timer Up/Timer DMX512 Add. To set thethe DMX channel under DMX mode by pressing andand Up/Timer and now”. Once the wireless control and system is by pressing Up/Timer Quick Start To under activate / screen terminate quick start function by Once pressing Up/Timer and OUTPUT CONTINUOUS OUTPUT MODE terminated then the letter “W” To will disappear accordingly. ). beUNDER showed under main screen display “Ready To Snow”. wireless control system be showed main display “Ready Snow”. Once the the wireless control system is is OUTPUT UNDER TIMER MODE Down/Volume buttons (ON/OFF). ВЫХОД СНЕГА В РЕЖИМЕ НЕПРЕРЫВНОЙ Down/Volume buttons (1 to 512 channels).When wireless control system is activated, letter “W” wil Down/Volume buttons (1РАБОТЫ to 512 channels). ing Up/Timer and dingly. ol system is activated, letter “W” will Вниз/Volume для настройки непрерывной подачи снега иStart нажмите кнопку остановки. Нажмите кнопку buttons (ON/OFF). Once Quick function is on, the output job under timer Pressterminated Down/Volume button to output continuously until Stop button isдля pressed. Quick Start To the activate /will terminate quick start function by pressing and is ontinuous mode by pressing Up/Timer and terminated then letter “W” will disappear accordingly. then the letter “W”main disappear accordingly. Press Up/Timer button to execute the interval/duration timing setSnow”. and press Stop to Up/Timer stop. be showed under screen display “Ready To Once the wireless control system sing Up/Timer and Wireless ONTo To activate/terminate the wireless control system by pressing Up/Timer Wireless ON activate/terminate the wireless control system by pressing Up/Timer andand on is on, the output job under timer yOnce pressing and is the wirelessUp/Timer control system or continuous output (LCD/W-1/DMX) mode terminated by power off is willon, bethe directly Down/Volume buttons (ON/OFF). Quick Start function outputresumed job under ). Quick Start activate /ОБЪЕМА terminate quick start function by pressing Up/Timer and Quick Start To To activate / terminate quick start function by Once pressing Up/Timer and OUTPUT UNDER CONTINUOUS OUTPUT MODE terminated then theВЕНТИЛЯТОРА letter “W” will disappear accordingly. НАСТРОЙКА ВЫХОДНОГО Down/Volume buttons (ON/OFF). When wireless control system is activated, letter Down/Volume buttons (ON/OFF). When wireless control system is activated, letter “W”“W” willwill power off will be directly resumed rt function is on, the output job timer SETTING AIRunder VOLUME Кнопка “AIR VOLUME”, расположенная наon задней панели генератора предназначена для настройки выходного объafterand power again. When the unitQuick is Start power off not under output mode then the LCD screenres or buttons continuous output (LCD/W-1/DMX) mode terminated power offunder will be directly X control mode by pressing Up/Timer Down/Volume (ON/OFF). Once Start function is on, the output job timer Down/Volume buttons (ON/OFF). Once Quick function is on, the output jobUp/Timer under timer Press button output continuously until Stop button isby pressed. To activate / to terminate quick start function by pressing ssing Up/Timer and QuickbeStart be showed under main screen display “Ready To Snow”. Once the wireless control system is showed under main screen display “Ready To Snow”. Once the wireless control system isand ема вентилятора. При увеличении выходного объема вентилятора снежинки становятся меньше. И, наоборот, при output then the be LCD screenresumed ated bymode power off will directly There’s a small button “AIR VOLUME” located at rear of the machine used for adjusting the fan output volume ssing Up/Timer and уменьшении выходного объема снежинки становятся крупнее. не менее, эти настройки не влияют willвентилятора resume to “Ready Snow” main screen display after power onTo again. When the unitQuick isТем power off not output mode thenunder the LCD annels). or continuous output (LCD/W-1/DMX) mode terminated bydirectly. power offiswill bethe directly resumed or continuous output (LCD/W-1/DMX) mode terminated byStart power off under will be directly resumed Down/Volume buttons (ON/OFF). Once function on, output job timers terminated then the letter “W” will disappear accordingly. terminated then the letter “W” will disappear accordingly. на выходной объем снега. ly. t under output mode job thenunder the general, LCD when the fan output is increased the snow flakes produced are smaller. In contrast, when the fan tion is on, the output timerscreen AIR In VOLUME SETTING will resume to “Ready To main screen display directly. ss control system by pressing Up/Timer andoutput after power on again. When the unit is Snow” power off not under output mode the LCD screen after power again. When the unit is power off not under output mode thenthen thewill LCD screen oron/continuous (LCD/W-1/DMX) mode terminated power off be directly resumed sing Up/Timer and Quick Start To To activate / terminate quick start function by pressing byUp/Timer Up/Timer Quick Start activate terminate quick start function by pressing andand ay directly. by power off will be directly resumed There’s a small button “AIR VOLUME” located at rear of the machine used for adjusting the fan output volume. 6 directly. OUTPUT UNDER TIMER MODE When wireless control system iswill activated, letter “W” will will resume to “Ready To Snow” main screen directly. resume to “Ready To Snow” main screen display after power on again. When the unit isdisplay power off not under mode then thetimer LCD screen Down/Volume buttons (ON/OFF). Once Quick Start function is on, the output under Down/Volume buttons (ON/OFF). Once Quick Start function is on, theoutput output job job under timer er output mode then the screen In LCD general, when the fan output is increased the snow flakes produced are smaller. In contrast, when the fan Press Up/Timer button toisexecute the interval/duration timing set and press Stop to stop. OUTPUT UNDER TIMER MODETo lay “Ready To Snow”. Once theand wireless control system will output resume to(LCD/W-1/DMX) “Ready Snow” main screen by display directly. pressing Up/Timer or continuous output mode terminated by power off will be directly resumed or continuous (LCD/W-1/DMX) mode terminated power off will be directly resumed d press Stop to stop. ctly. OUTPUT UNDER CONTINUOUS OUTPUT MODE Press Up/Timer to execute the6 interval/duration timing set and press Stop to stop. isappearisaccordingly. OUTPUT TIMER MODE button OUTPUT TIMER MODE system activated, letterUNDER “W”UNDER will after power again. When is power off not under output mode then LCD screen after power on on again. When thethe unitunit is power off not under output mode then thethe LCD screen g set and press Stop to stop. Down/Volume button output continuously until Stop button isStop pressed. OUTPUT UNDER OUTPUT MODE art byPress pressing and PressPress Up/Timer button toCONTINUOUS execute the interval/duration timing press to stop. Up/Timer button to execute the to interval/duration timing set set andand press Stop to stop. OUTPUT UNDER MODE nce function the wireless control system is Up/Timer will resume to “Ready To Snow” main screen display directly. will resume toTIMER “Ready To Snow” main screen display directly. button is pressed. Press button to output continuously untilset andStop button isStop pressed. Once Quick StartOUTPUT function isPress on, the output job Down/Volume under timer OUTPUT UNDER CONTINUOUS OUTPUT MODE UNDER CONTINUOUS OUTPUT MODE Up/Timer button to execute the interval/duration timing press to stop. button isStop pressed. AIR VOLUME SETTING ndStop press to stop. X) mode terminated by power offDown/Volume willUNDER be directly resumed Press button to output continuously Stop button is pressed. Press Down/Volume button to output continuously untiluntil Stop button is pressed. OUTPUT CONTINUOUS OUTPUT MODE ng Up/Timer andUNDER OUTPUT UNDER TIMER MODE OUTPUT TIMER MODE There’s AIR a small button “AIR VOLUME” located at rear of the machine used for adjusting the fan output volume. VOLUME SETTING tn is power off not under output mode then the LCD screen orisadjusting thePress fanPress output volume. Press Down/Volume button tointerval/duration output continuously until Stop button istopressed. on, the output job under timer Up/Timer button to execute timing set press Stop to stop. Up/Timer button to execute thethe interval/duration timing set andand press Stop stop. In general, when the fan output is increased the snow flakes produced are smaller. Inadjusting contrast, the when fan v There’s a small button “AIR VOLUME” located at rear of the machine used for fanthe output p button is pressed. VOLUME SETTING AIRAIR VOLUME SETTING ain screen display directly. smaller. contrast, when the fan volume. beOUTPUT directly resumed epower used off forInwill adjusting the fan output OUTPUT UNDER CONTINUOUS OUTPUT MODE UNDER CONTINUOUS OUTPUT MODE In general, when the fan output the snow flakes produced arethe smaller. Involume. contrast, There’s a small button “AIR VOLUME” located atincreased rear of the machine used for adjusting fan output volume.when th There’s a small button “AIR VOLUME” located at is rear of the machine used for adjusting the fan output AIR VOLUME SETTING 6 output then LCD screen ced aremode smaller. Inthe contrast, when the fan button Press Down/Volume button to output continuously Stop button is pressed. Press Down/Volume to output continuously untiluntil Stop button is pressed. In general, when the output is increased snow flakes produced are smaller. Inadjusting contrast, when fan volume In general, when the fan fan output is“AIR increased the the snow flakes produced are smaller. In contrast, when the fan There’s a small button VOLUME” located at rear of the machine used for the fan the output 6 6 y. d for adjusting the fan output volume. In general, when the fan output is increased the snow flakes produced are smaller. In contrast, when the fan VOLUME SETTING VOLUME l/duration timingAIR setAIR and press SETTING Stop to stop. 6 6 re smaller. In contrast, when the fan There’s a small button “AIR VOLUME” located at rear of the machine used for adjusting the fan output volume. There’s a small button “AIR VOLUME” located at rear of the machine 6 used for adjusting the fan output volume. n the unit is power off not under output mode then the LCD screen now” main screen display directly. Примечание: При определении генератором недостаточного количества жидкости в трубке, на экране будет отображено сообщение “No Fluid”. В результате генератор будет заблокирован и подача снега прекратится, исключая таким образом возможную холостую работу машины. Немедленно убедитесь в том, что жидкость поступает из резервуара. Для разблокировки экрана, нажмите e interval/duration timing set and press кнопку остановки и удержите ее в нажатом положении в течение 2 секунд, затем Stop to stop. генератор снова начнет закачивать жидкость из резервуара. После того как трубка заполнится жидкостью генератор MODE начнет нормально функционировать. ОПЕРАЦИИ ПУЛЬТА ДУ ut continuously until Stop button is pressed. W-1: Беспроводной пульт ДУ W-1 состоит из передатчика, оснащенного двумя кнопками для включения/выключения подачи снега, и закрепленного к SW-250 приемника. *Передатчик ed at rear of the machine used for adjusting the fan output volume. d the snow flakes produced are smaller. In contrast, when the fan 6 С помощью передатчика дистанционное управление возможно на расстоянии 50 метров. Передатчик совместим с любым приемником SW-250 и позволяет одновременно управлять неограниченным количеством генераторов. Нажмите кнопку “А” для подачи снега. Светодиодный индикатор на панели передатчика будет гореть. Для прекращения подачи снега нажмите кнопку “B”. *Приемник Приемник протестирован и встроен SW-250. Не пытайтесь отсоединить его. 7 Приемник может откликаться на команды 5 различных передатчиков, зарегистрированных на данном генераторе. Входящий в комплект передатчик уже зарегистрирован на генераторе до его поставки. Теперь вы можете пользоваться им без выполнения каких-либо настроек. Замена батарейки передатчика Если рабочий диапазон передатчика уменьшился, возможно, разрядилась батарейка и следует ее заменить. Для этого снимите заднюю крышку и извлеките батарейку. Вставьте новую 12-вольтовую батарейку и закройте крышку отсека батареек. SC-2 (приобретается отдельно): Проводной пульт ДУ с кабелем длиной 7,6 м и 4-контактным XLR штекером. Красная кнопка включения/выключения питания Для подачи снега установите этот переключатель в значение ON. Для остановки установите его в значение ON. Регулятор объема С его помощи можно отрегулировать объем подачи снега в диапазоне от 10% до 100%. Красный светодиодный индикатор Данный индикатор горит красным при подключении пульта ДУ к генератору. Зеленый светодиодный индикатор Зеленый индикатор горит при установке красного переключателя в положение ON. 8 ОПЕРАЦИИ DMX УПРАВЛЕНИЯ Генератор SW-250 оснащен встроенным DMX контроллером, обращение к которому осуществляется с ЖК-панели генератора. SW-250 использует 1 канал для управления включением/выключением устройства и выходным объемом снега. Каждый канал предлагает диапазон значений от 0 до 255. Функцию включения/выключения можно запрограммировать с помощью контроллера DMX или программного обеспечения DMX, используемого сценическими операторами световых эффектов. Канал А 11-255 = ВКЛ. (1%-100%) 0-10 = ВЫКЛ. Если Канал А установлен в значение от 0 до 10, то устройство будет выключено. При установке в значение 11 - 255 устройство будет включено. Примечание: Если кабель DMX отключен от устройства, то ЖК-панель управления, передатчик W-1 и подключенный контроллер HC-1 будут недоступны для использования. Обслуживание 1. Не допускайте загрязнения жидкости для производства снега. Всегда возвращайте на место крышку резервуара генератора и контейнера с жидкостью сразу после заполнения. 2. Если вы закончили работу на генераторе и хотите убрать его, не забудьте промыть систему чистой водой, которую необходимо прокачать в течение 1 или 2 минут. Таким образом, вы обеспечите долгий и бесперебойный срок службы мотора и форсунки. 3. Настоятельно рекомендуем регулярно очищать пыль/грязь, скопившуюся вокруг вентиляционных отверстий генератора снега (расположены по обеим сторонам машины). Пройдитесь небольшой щеточкой, например, зубной щеткой, по направлению сверху вниз. Таким образом, вы исключите попадание мусора внутрь машины, который может привести закупориванию. ПРЕДОСТЕРЕЖЕНИЕ ! Не пейте жидкость для получения снега. Если вы все же проглотили ее, немедленно обратитесь к врачу. Если жидкость для получения снега попала на кожу или в глаза, тщательно промойте их водой. Если вы выполнили все вышеописанные действия, но выходная струя все еще слишком мала или вообще отсутствует, если появился шум насоса, немедленно отключите генератор из сети. Проверьте уровень жидкости, внешний предохранитель, подключение пульта ДУ и электропитания. Если все в порядке, попробуйте включить машину еще раз. Если генератор все еще функционирует неверно, прекратите использование так как это может привести к непоправимому повреждению устройства. Верните машину дилеру ANTARI. 9 Жидкость для производства снега Жидкость Antari SL-5/SL-5(A) была специально разработана для использования в генераторах снега Antari. Antari SL5(A) представляет собой нетоксичную жидкость, из которой производится легко рассеиваемый снег. Технические характеристики Модель SW-250 Блок питания 100 - 120 В, 50 - 60 Гц Энергопотребление 220 - 240 В постоянного тока, 50 - 60 Гц 600 Вт (минимальный выходной объем), 1290 Вт (максимальный выходной объем) Выходной объем 250 мл/мин Вместимость резервуара 5 литров Расход жидкости 4 мин./литр Вес 12,6 кг Габариты (ДхШхВ) мм Д 544/ Ш 276/ В 228 Approval Данный продукт соответствует требованиям директивы R&TTE (Radio and Telecommunication Technical Equipment) Европейского союза и является продуктом класса 1. Во всех странах-членах ЕС, работа этой беспроводной системы, как правило, утверждается национальным регулирующим органом связи. Данная система не требует лицензирования. В некоторых странах за пределами ЕС, для работы этой беспроводной системы может потребоваться утверждение национальным регулирующим органом телекоммуникаций. Сохраните это руководство пользователя для последующих обращений. 10 Более подробную информацию о продуктах Antari вы можете найти на веб-сайте: www,antari,com Необходимые ответы на вопросы вы можете получить, обратившись к нам по адресу: [email protected] C08SW2501 11 36
